Connect to your instance
Reach a running instance over SSH (Linux / BSD), RDP (Windows), or the web console built into the Portal.
Prerequisites
- A running instance (status Active in the project's Instances list).
- A reachable IP address — either the instance's project IP if you're already inside the project's network, or a floating IP for external access.
- A security group on the instance allowing the relevant inbound
port from your source IP. See
Configure security groups.
- Port 22 for SSH (Linux / BSD).
- Port 3389 for RDP (Windows).
- The matching credential: a private SSH key for Linux/BSD (the key whose public half was selected on the launch form), or the Administrator password for Windows (retrieved via the OpenStack CLI — see below).
Connect over SSH (Linux / BSD)
-
Open a terminal and connect:
Common default usernames per image:
Image Default user Ubuntu ubuntuDebian debianRocky / AlmaLinux / CentOS cloud-userFedora fedoraOpenBSD / FreeBSD the user you set up at first boot (cloud-init may default to root) -
Accept the host key prompt on first connection.
-
Once in, change to root if needed:
Connect over RDP (Windows)
Windows images don't accept SSH keys directly — the OpenStack image service stores an encrypted Administrator password generated at first boot. You decrypt it locally with the private key you used at launch.
-
Retrieve the encrypted password with the OpenStack CLI:
See Use the OpenStack CLI for the
clouds.yamlsetup behind--os-cloud breqwatr. -
Decrypt it with the private key whose public half you selected on the launch form:
openstack --os-cloud breqwatr server show <instance-id-or-name> --decrypt-private-key ~/.ssh/id_ed25519 -f value -c adminPassOn some clouds the helper is exposed as
openstack server get
password <id> --private-key ~/.ssh/id_ed25519
; the flags vary slightly by CLI version. -
Open an RDP client and connect:
- Windows —
Remote Desktop Connection(mstsc.exe). - macOS —
Microsoft Remote Desktopfrom the App Store. - Linux —
remmina,xfreerdp,freerdp3-x11.
- Windows —
-
Enter the instance IP, sign in as
Administrator, paste the decrypted password. -
Accept the certificate prompt.
Connect via the web console (any OS)
The Portal embeds a noVNC console for every running instance. Use it when SSH or RDP isn't an option (network reachability, locked out, debugging a boot failure).
-
Open the instance from the project's Instances list — click its name in the list to open the detail page.
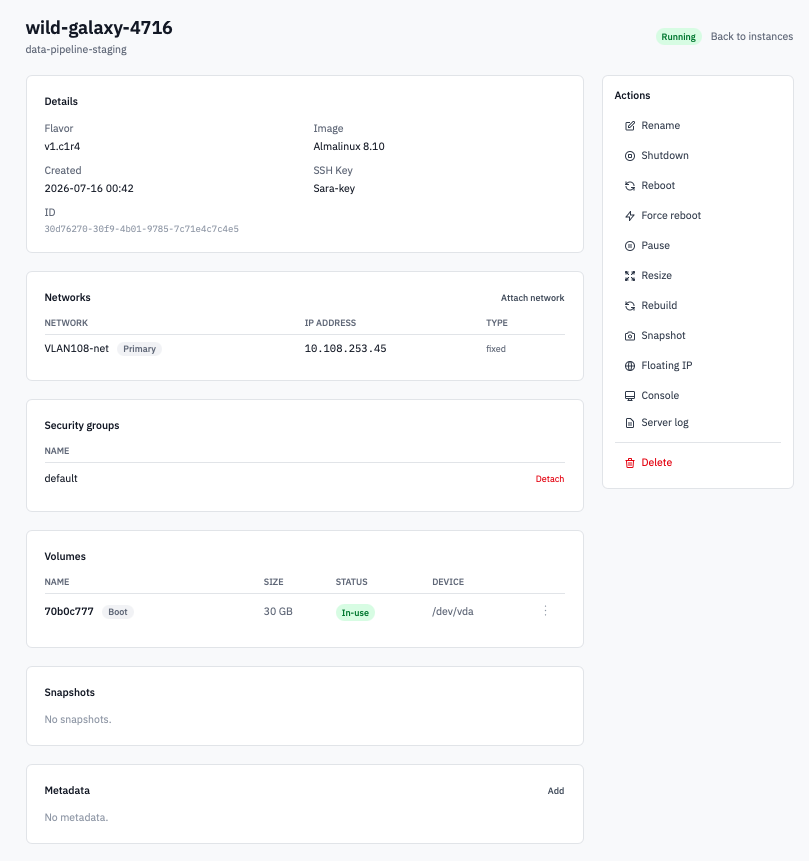
Instance detail page with the Console button visible alongside instance metadata.
-
Click Console in the action bar.
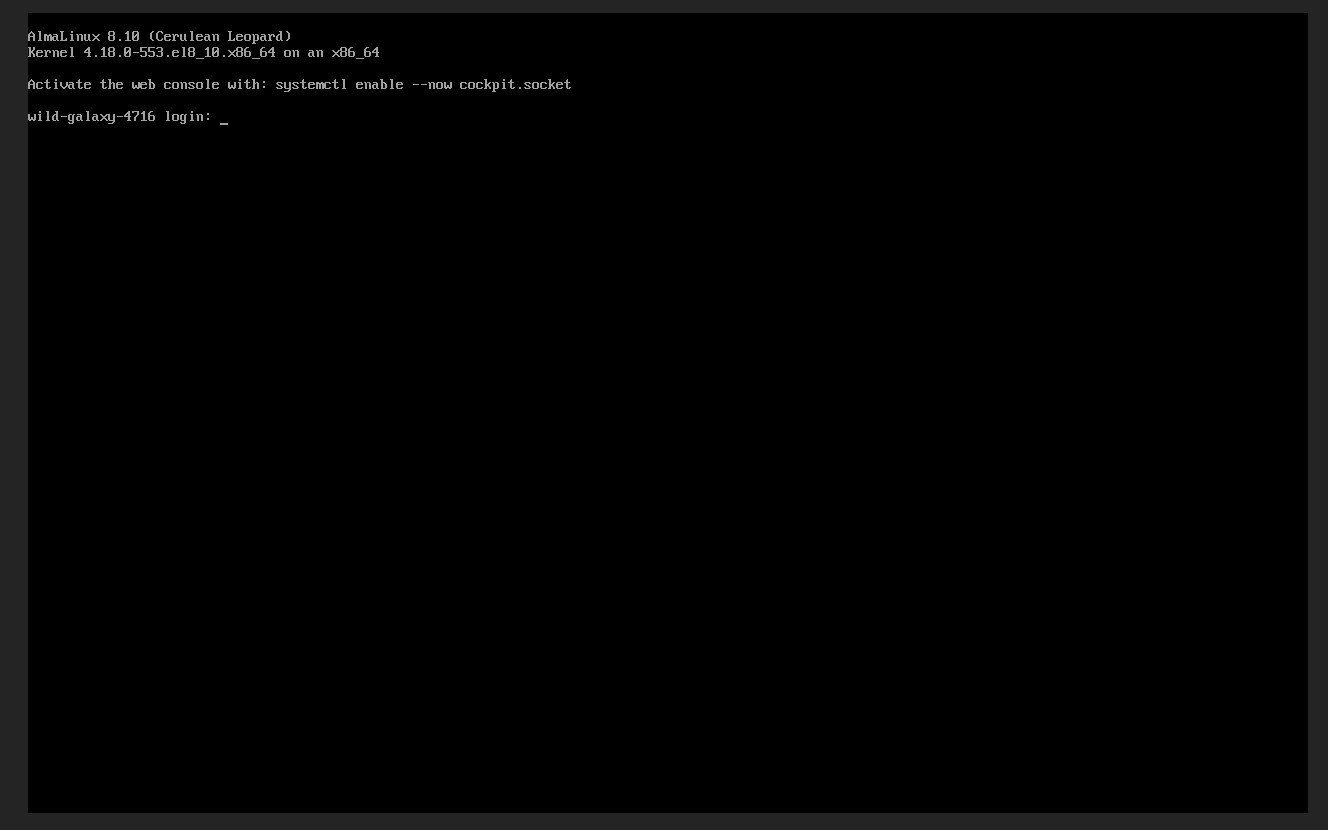
Embedded noVNC console showing a Linux login prompt.
The console opens in-page. Login uses the same credentials you'd use over SSH or RDP — the web console is just a different transport.
-
To grab the boot log without an interactive session, click Server log instead. The most recent console output renders in a modal.
Verification
- SSH lands you at a shell prompt.
- RDP lands you at the Windows desktop.
- The web console shows a
login:prompt (Linux) or the Windows sign-in screen.
Next steps
- Configure security groups to open more ports.
- Allocate a floating IP if the instance only has a project-internal address.
- Use the OpenStack CLI for command-line management.
If you can't connect, check the security group rules first, then the floating-IP attachment, then the instance's status and the console boot log via the Server log button.