Create a Kubernetes cluster
Provision a managed Kubernetes cluster in a Breqwatr Cloud project. The Portal's new-cluster form takes a handful of inputs and Magnum spins up the master(s), worker(s), and underlying networking from there.
Prerequisites
- A project you can launch into (owner or admin role).
- Enough quota for the planned node count and the cluster's worker boot volumes — see Quotas and limits.
- An SSH key on your account. At least one key is required — the Portal lists your keys in the Keypair dropdown on the new-cluster form.
- The
kubectlCLI installed locally for post-cluster work.
Create via the Portal
1. Open the new-cluster form
-
Open the project from the side navigation, then click Clusters under its menu.
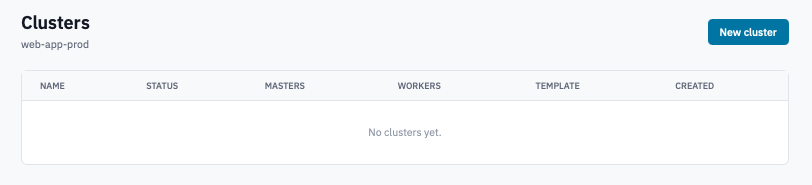
Clusters page with the New cluster button visible.
- Click New cluster.
2. Fill in the form
-
Name — required, short, unique within the project.
-
Master nodes — defaults to 1. Set to 3 (or more) for production-grade redundancy; tick Highly available control plane alongside.
-
Worker nodes — defaults to 3.
-
Highly available control plane — provisions an Octavia load balancer in front of the Kubernetes API. Required for multi-master clusters; safe to leave on for single-master. Untick only for short-lived experiments where you want to skip the LB cost.
-
Cluster template — required. The dropdown lists templates the operator has published. Each template fixes the Kubernetes version, OS image, and driver (CNI, container runtime). Pick the template that matches the K8s version you want; if nothing on the list fits, contact support.
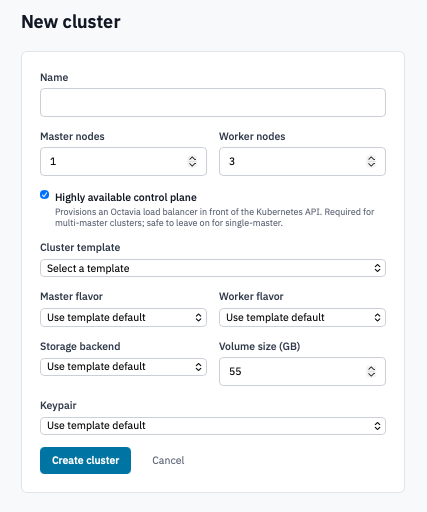
New cluster form with master/worker counts, HA toggle, and the cluster template dropdown open.
-
Master flavor — leave on Use template default unless you have a reason to override. The template's default is sized for the version it ships.
-
Worker flavor — pick the flavor your workloads need. The dropdown shows vCPU and RAM per flavor.
-
Storage backend — leave on Use template default for the common case. Override only if your deployment exposes more than one volume type and you have a reason to pin one.
-
Volume size (GB) — boot volume per node. Defaults to 55. Increase for nodes that pull large images or hold sizeable container layers.
-
Keypair — pick a key from your account's SSH keys. The Portal uses this to seed the cluster's nodes; you'll use the matching private key to SSH into nodes for debugging.

New cluster form scrolled to the Storage backend, Volume size, and Keypair fields.
- Click Create cluster.
3. Watch provisioning
The cluster appears in the Clusters list with status CREATE_IN_PROGRESS. The page auto-refreshes. Provisioning a small cluster typically takes 5–10 minutes; an HA cluster takes longer because the Octavia LB has to come up before the K8s API is reachable.
Clusters list with one cluster in CREATE_IN_PROGRESS and another in CREATE_COMPLETE.
Status transitions:
| Status | Meaning |
|---|---|
| CREATE_IN_PROGRESS | Magnum is provisioning instances, networks, the LB (if HA), and joining nodes. |
| CREATE_COMPLETE | All nodes joined and Healthy. The Download kubeconfig button is enabled. |
| CREATE_FAILED | Something failed during provisioning. The detail page shows the Magnum error. |
| UPDATE_IN_PROGRESS / UPDATE_COMPLETE | Reflects a resize or in-place update. |
| DELETE_IN_PROGRESS | Tearing down. |
4. Open the cluster detail page
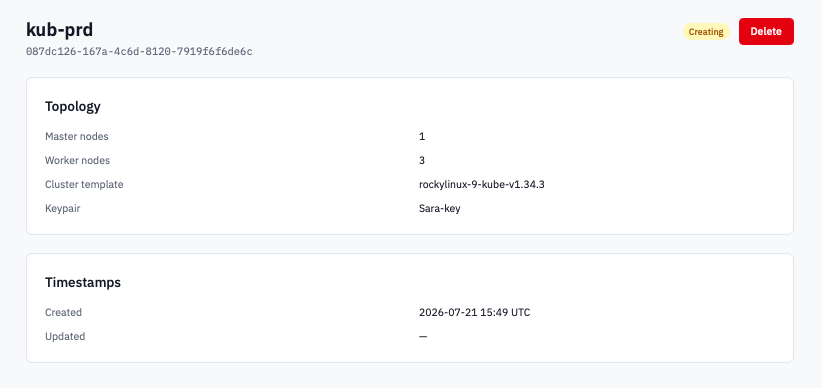
Click the cluster's name in the list to open it. The detail page is where every per-cluster action lives — kubeconfig download, resize, delete — plus the cluster's metadata.
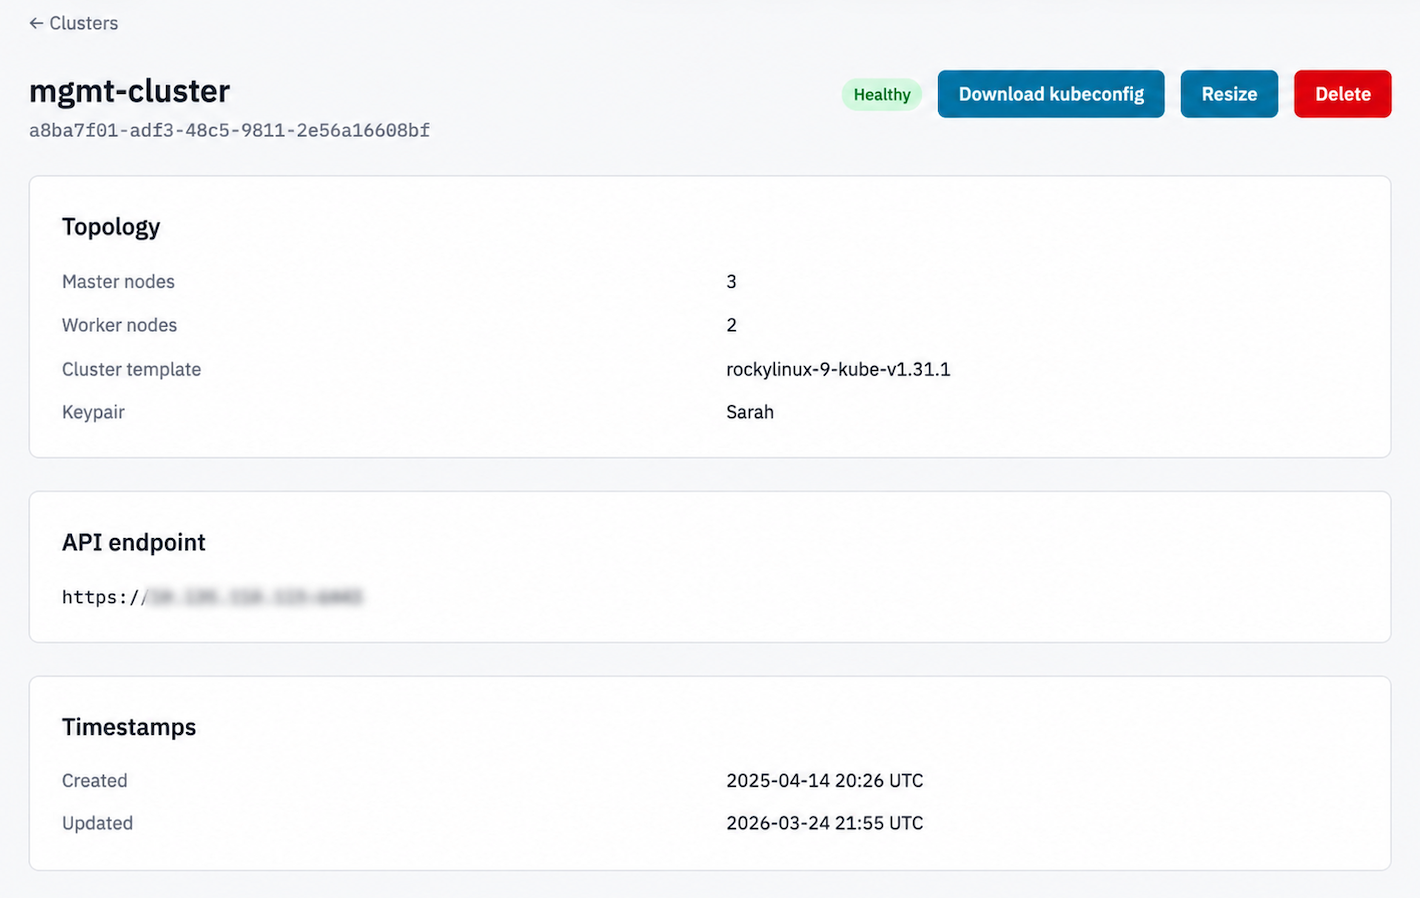
Cluster detail page in CREATE_COMPLETE state showing the Download kubeconfig and Resize buttons in the header.
The header shows the cluster's name and UUID, the status badge, and (when the cluster is CREATE_COMPLETE or UPDATE_COMPLETE) the Download kubeconfig and Resize buttons. The red Delete button is always present.
Below the header, three cards:
| Card | Contents |
|---|---|
| Topology | Master node count, worker node count, the cluster template, the keypair that was used. |
| API endpoint | The Kubernetes API URL — what kubectl talks to. Only appears once the API is reachable; missing on clusters still in CREATE_IN_PROGRESS. |
| Timestamps | When the cluster was created and last updated, in UTC. |
If the cluster status ends in _FAILED (e.g. CREATE_FAILED,
UPDATE_FAILED), a red Failure card appears above the
others with the Magnum status reason and, when available, a
per-resource fault dictionary identifying which underlying Heat
resource failed.
5. Download the kubeconfig
-
With the cluster in CREATE_COMPLETE, click Download kubeconfig in the detail page header.
-
Save the downloaded
configfile and pointkubectlat it:mkdir -p ~/.kube mv ~/Downloads/config ~/.kube/<cluster-name>.config export KUBECONFIG=~/.kube/<cluster-name>.config kubectl get nodes -o wideAll nodes should show Ready.
6. Resize worker nodes
You can scale workers up or down at any time — masters are immutable.
-
On the cluster's detail page, click Resize.
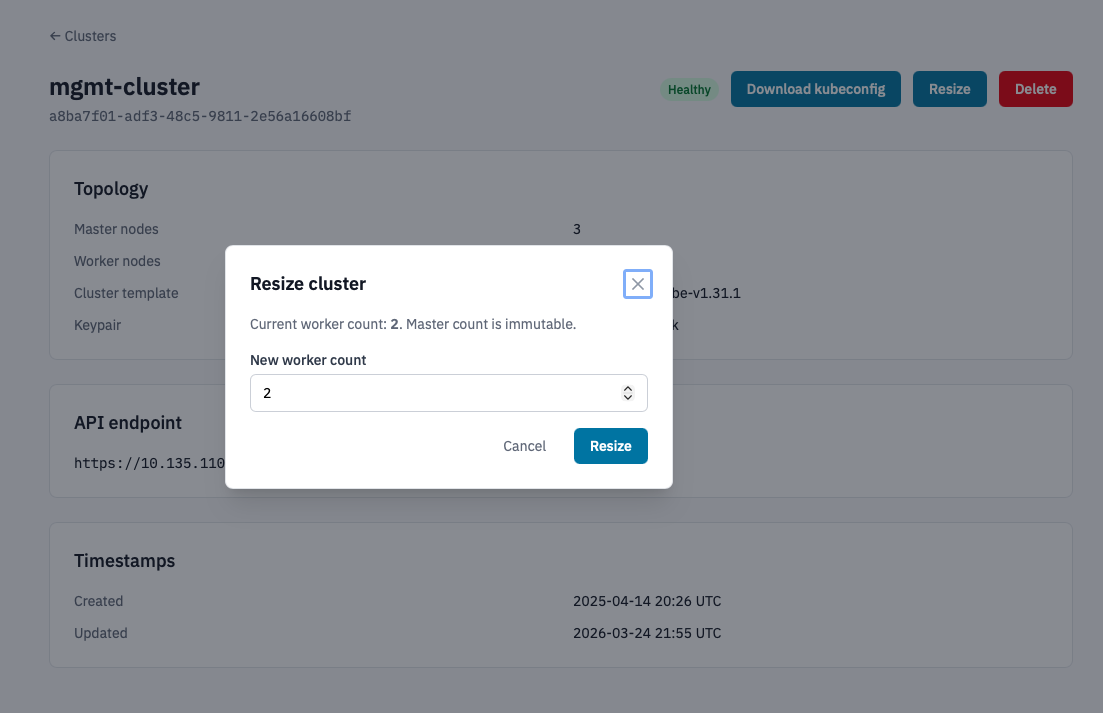
Resize cluster modal with the current and new worker count fields.
-
Enter the new worker count and click Resize.
Status moves to UPDATE_IN_PROGRESS. Magnum adds (or drains and removes) nodes one at a time.
7. Delete a cluster
- On the cluster's detail page, click Delete.
-
Confirm by typing the cluster's name and clicking Delete cluster.
Warning: Deletes the cluster's instances, networks, LB (if HA), and Heat stack. Anything stored in pod-attached storage that's hostPath / emptyDir is lost; PVCs backed by Cinder volumes survive separately and need to be cleaned up on the Volumes page.
Create via the OpenStack CLI
The CLI flow uses the Magnum (COE) subcommand. Same authentication
as everything else: an application
credential downloaded as
clouds.yaml.
-
Install the CLI clients:
-
List available cluster templates to pick one:
-
Create the cluster:
openstack --os-cloud breqwatr coe cluster create my-cluster \
  --cluster-template <template-uuid-or-name> \
  --keypair <your-key-name> \
  --master-count 1 \
  --node-count 3
Add
--master-flavor <flavor>and--flavor <flavor>to override the template defaults. -
Wait for the cluster to reach
CREATE_COMPLETE: -
Download the kubeconfig:
-
Resize:
-
Delete:
Verification
kubectl get nodes -o widelists all expected masters and workers in Ready state.kubectl get pods -Ashows the cluster's system pods (kube-system, kube-flannel / calico, coredns) running.- The Portal's cluster detail page shows CREATE_COMPLETE with the master and worker counts you asked for.
Next steps
- Create a Kubernetes cluster with GPUs if your workloads need accelerators.
- Workload-side tutorials in the Kubernetes AI sub-section: cluster autoscaling, gang scheduling, KubeRay, Kubeflow, and more.