Quotas and limits
Every project has hard limits on the cloud resources it can consume — memory, storage, instances, vCPUs, and floating IPs. The limits are set by Breqwatr support; you can read the current limits at any time and submit a request to raise them when you need more.
Quotas are independent of billing. A project on a paid billing plan still hits its quota wall first, and a project under its quota with no auto-pay set up still receives invoices in the regular cadence.
Prerequisites
- An organisation you're a member of as owner, admin, or member (members can read the page) — only owners and admins can submit or edit increase requests.
Steps
1. Read current quota and usage
-
Open the project from the side navigation, then click Quota under its menu.
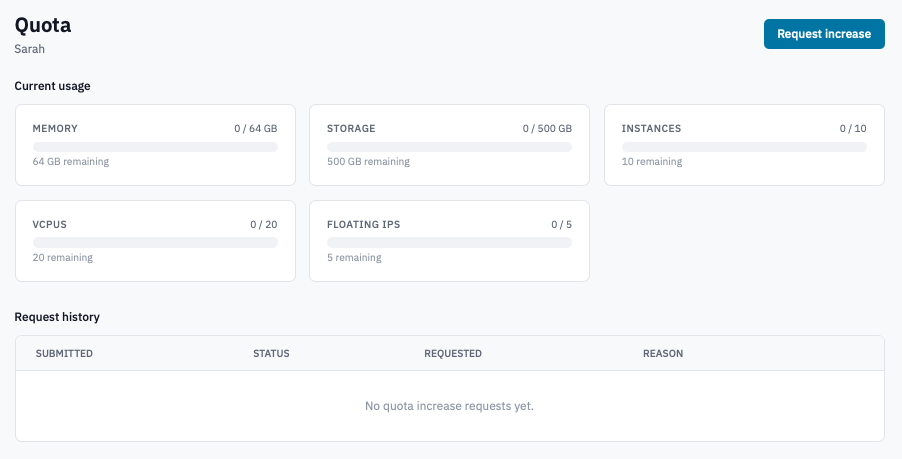
Quota page showing the five resource cards with usage bars.
-
Each card shows one resource:
- Memory (GB)
- Storage (GB)
- Instances
- vCPUs
- Floating IPs
Each card displays the current usage, the limit, and a bar with the percentage used. A card showing No limit means the resource isn't quota-capped on this project.
-
Bar colours match the storage convention used elsewhere in the Portal:
- Green — healthy headroom.
- Yellow at 80%+ — approaching the limit. Plan a request now rather than waiting for a launch to fail.
- Red when over or right at the limit — new launches that cross the cap are refused immediately by OpenStack with a quota error.
2. Request an increase
-
Click Request increase in the top right of the Quota page.
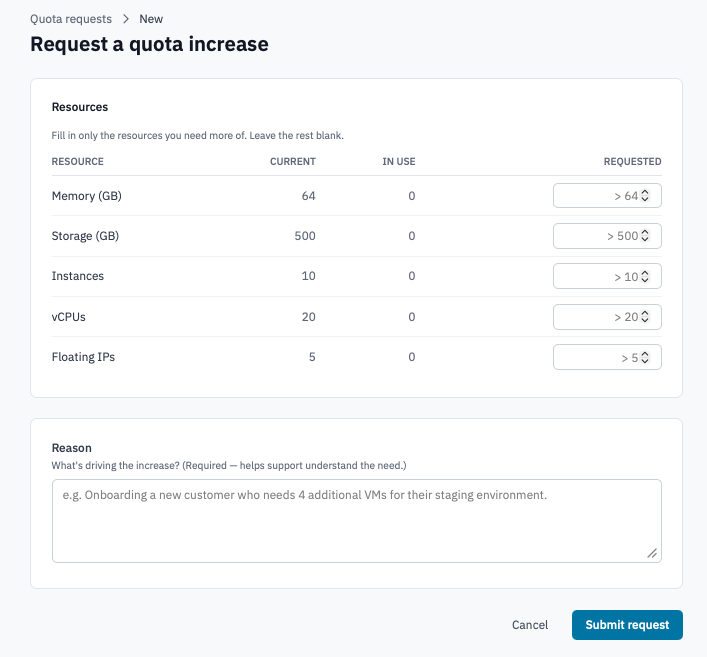
Request increase form with the resource table and reason box.
-
In the Resources table, fill in the desired new value only for the resources you need more of. Leave the rest blank — the form doesn't touch resources you don't fill in.
Each row shows the Current limit and the In use value so you can pitch a target with context (e.g. "currently 8 vCPUs, using 7, requesting 16").
-
Fill in the Reason field. Required. Anything from a single line ("Need 4 more VMs for staging") to a full ticket helps support move quickly.
-
Click Submit request.
The page returns to Quota with a notice that the request was submitted and support has been notified. Audit log records the event for your organisation.
3. Track an open request
The Request history table at the bottom of the Quota page lists every request the project has submitted, newest first.
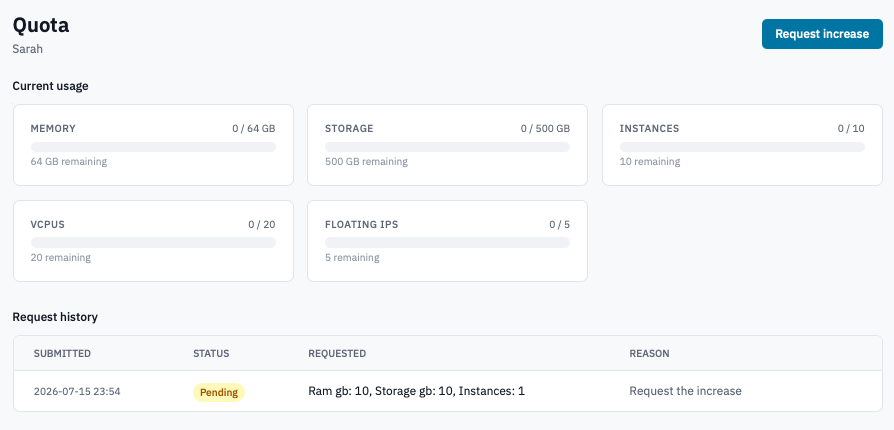
Request history table with a mix of pending, approved, and needs-info rows.
Status badges:
| Badge | Meaning |
|---|---|
| Pending (yellow) | With support, awaiting a decision. |
| Needs info (blue) | Support has asked for more detail — read the note below the row and edit the request to respond. |
| Approved (green) | Support raised the limit; check the Current value on the matching usage card. |
| Rejected (red) | Support declined; read the note for the reason. Resubmit (Step 4) if the constraints have changed. |
If support has left a comment, it appears as Note from support on a second row right below the request.
4. Edit and resubmit a request
You can edit any request that's still in Pending or Needs info state. Editing replaces the requested values and reason, and puts the request back to Pending for another review — any prior support note is cleared.
-
In the Request history row, click Edit.
Screenshot needed
Edit quota increase request page with the resource table prefilled.
-
Update the values and the reason as needed, then click Save changes.
The request reappears at the top of the history with Pending status and support is re-notified.
Approved or Rejected requests can't be edited — submit a new request instead.
Verification
- After a successful submit, the new request appears at the top of Request history with a Pending badge.
- After support approves, the corresponding Current value in the matching resource card matches the new limit on your next page refresh.
- The Audit log records each submission and
resubmission under
customer.quota_increase_requested.
Next steps
- Manage projects — separating workloads across projects spreads quota pressure.
- Billing overview — projected burn can warn you ahead of a quota wall.
- Audit log — see every quota request your team has filed.