Create a volume
Volumes are persistent block storage you can attach to an instance. Create one when you need a data disk separate from the instance's root disk, or to restore from a snapshot.
Prerequisites
- A project you can launch into (owner or admin role).
- Enough storage quota for the size you want — see Quotas and limits. The form shows you the remaining storage live.
Steps
1. Open the new volume form
-
Open the project, then click Volumes under its menu.

Volumes page with the New volume button visible in the top right.
-
Click New volume.
2. Fill in the form
-
Name — short and descriptive. The name shows on attach pickers and the snapshots index, so a label that ties to the workload helps (e.g.
pg-data-01,web-logs-staging). -
Description (optional) — anything that helps teammates tell volumes apart later.
-
Size (GB) — minimum 1, default 10. The label above shows the storage quota remaining; the field is capped at it so you can't oversubscribe.
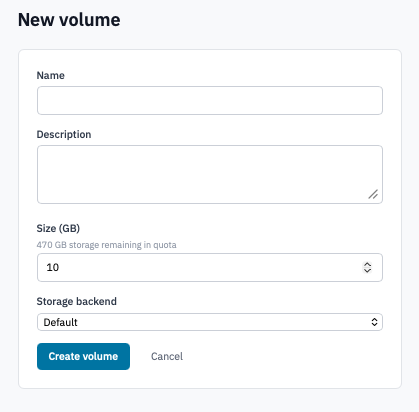
New volume form with the size field showing the remaining-storage hint.
-
Storage backend (optional) — pick from the dropdown if your deployment exposes more than one volume type (SSD vs HDD, replicated vs local). Leave on Default if you don't have a reason to change it.
-
Click Create volume.
3. Create a volume from a snapshot (alternative entry)
You can also create a volume from an existing snapshot. The flow starts from the snapshot, not from the New volume button:
- Open Snapshots under the project menu — see Manage snapshots.
-
Click Create volume from snapshot on the snapshot's row.
The new-volume form opens with the snapshot pre-selected, the size pinned to match the snapshot, and a name suggested as
<snapshot-name>-restore. Adjust the name and description as needed, then click Create volume.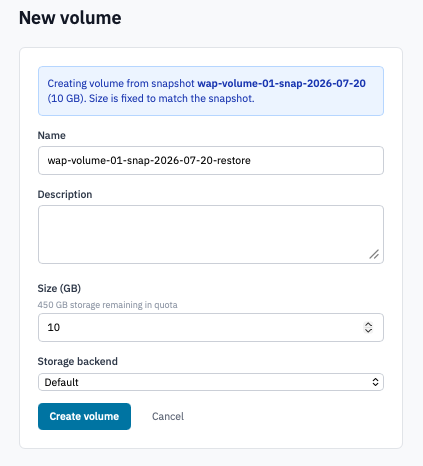
New volume form opened from a snapshot, with the blue info banner and locked size field.
Verification
The new volume appears in the Volumes list with status Available. The list auto-refreshes while creation is in flight; once status reaches Available the volume is ready to attach or take snapshots of.
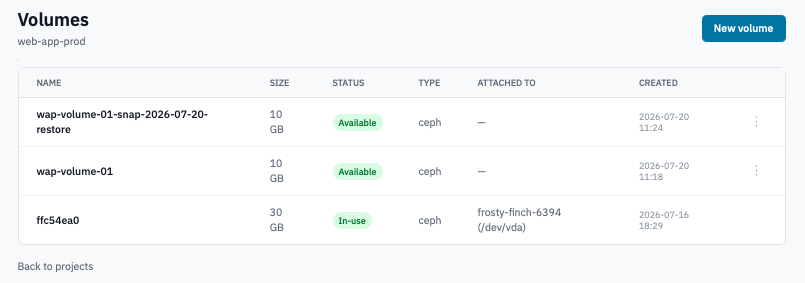
Volumes list with a newly-created volume in the Available state.
Next steps
- Attach the volume to an instance.
- Take a snapshot once the volume has data on it.
- Resize the volume if the workload outgrows the original size.