Create an organisation
An organisation is the unit of ownership in Breqwatr Cloud — your team, your billing, and your projects all live inside one. This page explains the three ways an organisation comes into being so you can get to one and start working.
How you end up in an organisation
Self sign-up
When you sign up on your own, an organisation
is created for you automatically with a placeholder name (e.g.
Alex's Organisation). You're the owner. Rename it from
Organisation settings at any time.
Invitation
When a teammate sends you an invitation, accepting it adds you to their existing organisation in the role they chose for you. You don't get a new organisation. See Invite teammates for the full flow.
Request an organisation (admin-approved)
If you're signed in but haven't ended up in any organisation — for example, an administrator removed you from your previous one — the dashboard prompts you to Request an organisation. An administrator reviews each request and either creates the organisation and adds you as the owner, or rejects it with a note.
Prerequisites
- A confirmed Breqwatr Cloud account.
Steps
-
Sign in to the Portal.
-
If the dashboard prompts you to request one, click Request an organisation.
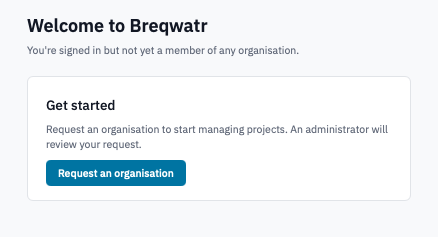
Orgless dashboard with the "Request an organisation" call to action.
-
Fill in:
- Organisation name — what you want the organisation to be called.
- Note for administrator (optional) — anything that helps an administrator decide quickly (your company name, the team you're on, the contract reference).
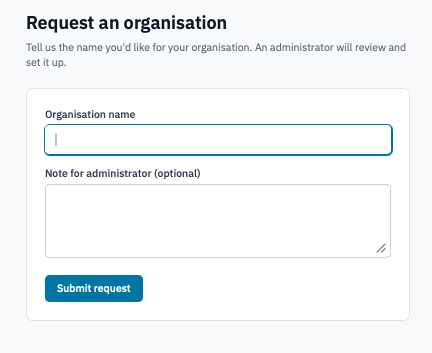
Request an organisation form.
-
Click Submit request.
The dashboard now shows a Pending review card with your requested name and the submission time. You'll receive an email when an administrator reviews it.
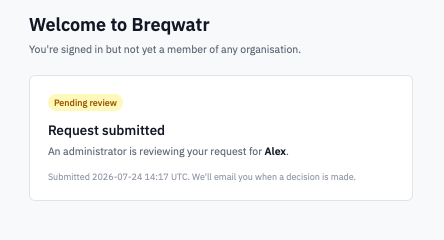
Dashboard with a pending organisation request.
Verification
- Approved — your next sign-in lands you on the new organisation's dashboard with you as the owner.
- Rejected — the dashboard shows the rejection notice and the reason your administrator gave. Submit a fresh request after addressing the feedback.
Next steps
- Invite teammates so others can work alongside you.
- Manage projects — projects hold your instances, volumes, and networks.
- Organisation settings — rename the organisation, manage access controls.